
Hello everyone, today I want to share with you the incredible journey of building my custom mechanical keyboard, the Momo. If you’ve ever stopped to think about the importance of the keyboard you use every day, you’re in the right place. For many of us, a keyboard is much more than just a peripheral; it’s an extension of our creativity and productivity, and every keystroke can be a unique experience.
If you’re a tech enthusiast looking for a customization adventure, building a mechanical keyboard is a fascinating journey. Recently, I shared the story behind my Appa keyboard, which uses Alps switches, in a previous post.
Now, let’s dive into the creation of the Momo mechanical keyboard, which, although inspired by “Appa,” brings its own unique characteristics. This keyboard uses Cherry MX switches, features hotswap, and is a tribute to Aang’s adorable pet, Momo.

The Magic of Mechanical Keyboards
Mechanical keyboards are widely appreciated for their durability, tactile feel, and customization possibilities. Unlike conventional membrane keyboards, mechanical keyboards use individual switches for each key, providing a unique typing experience. They come in a variety of switch types, each with its own characteristic feel and sound, allowing you to choose what best fits your typing style.
Starting with a Plan
Just like any project, building a custom mechanical keyboard starts with careful planning. The Momo keyboard was designed to provide a smooth and comfortable typing experience, combined with a stunning look. Here are some essential planning steps:
- Choosing the Components;
- Making the Printed Circuit Board (PCB);
- Choosing the Switches;
- Choosing the Keycaps;
- Customizing the Case.
I’ll detail each of these steps below.
Choosing the Components
The first step was carefully selecting the components that would make up the Momo keyboard. My vision for the Momo included adding backlight to all keys, as well as underglow and the ability to quickly swap keys, which is possible thanks to the hotswap feature.
To achieve this result, I chose:
- Backlight for all keys;
- Underglow;
- Hotswap.
To accommodate these features, I chose the RP2040 microcontroller. This ARM Cortex M0+ microcontroller has a 133MHz clock, 264kB of SRAM, and 4MB of Flash memory (on most development boards). Plus, it’s widely available and affordable, making it the perfect choice for this project.
Making the Printed Circuit Board (PCB)
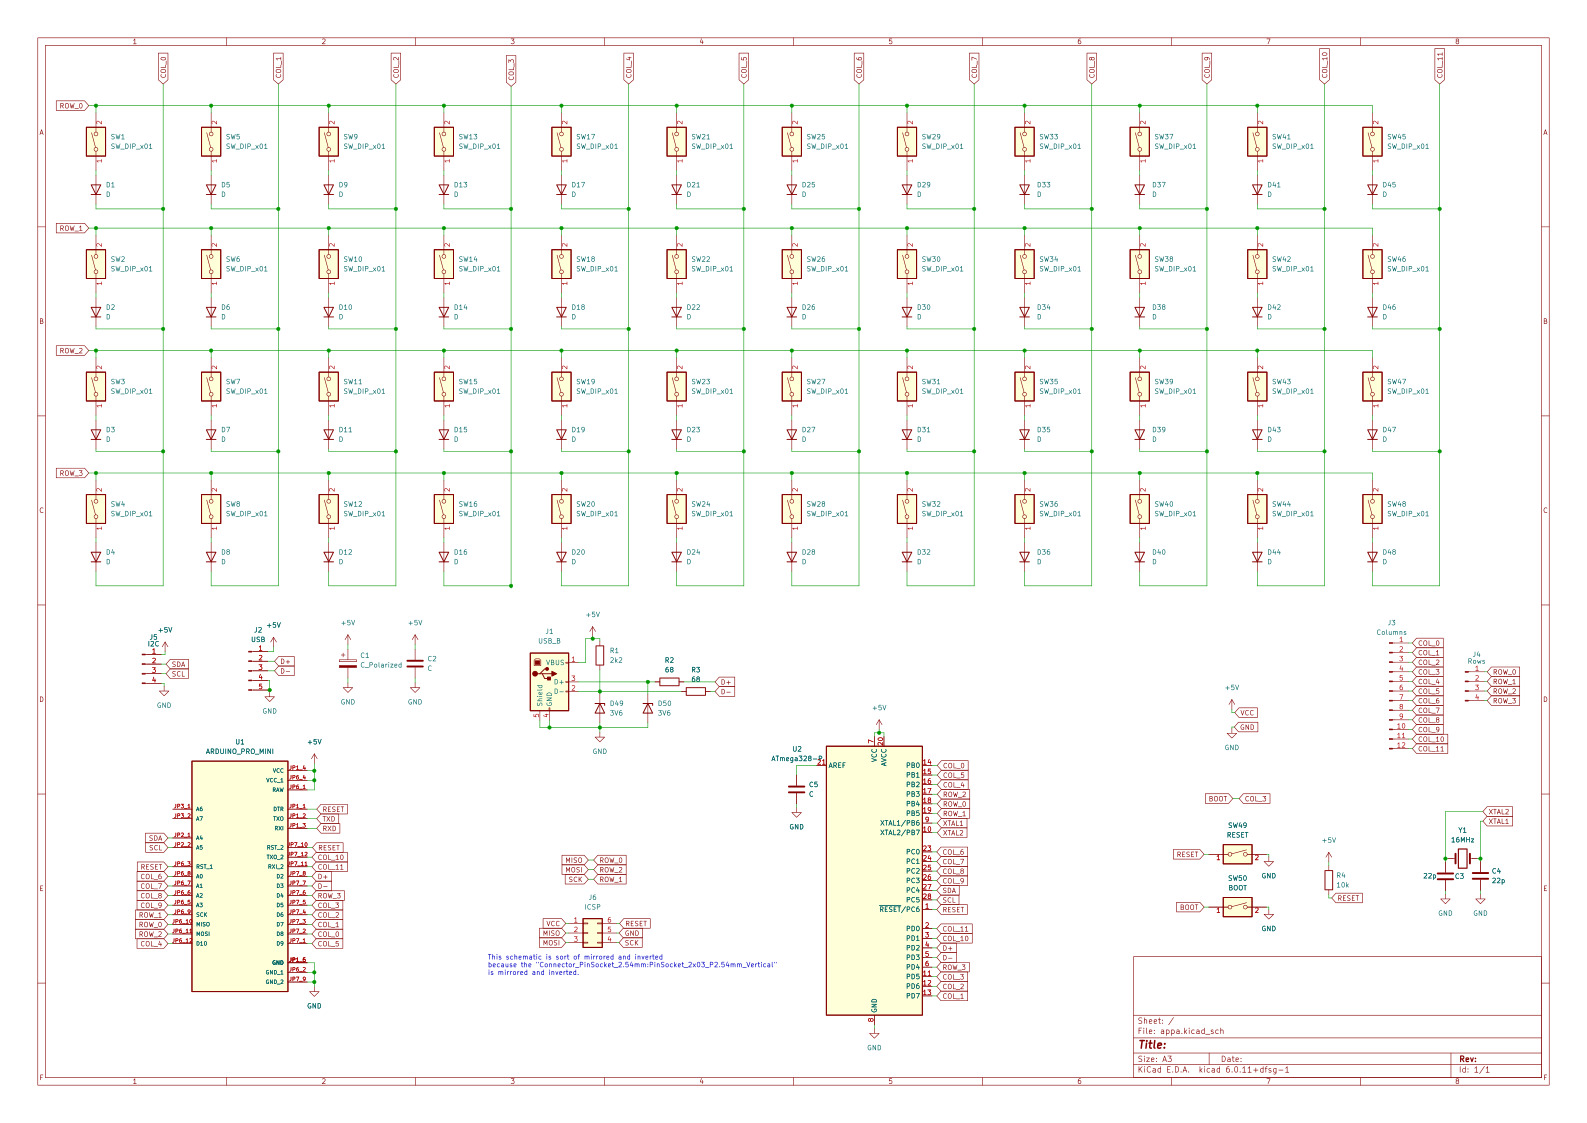
The PCB is the heart of the keyboard, where all the magic happens. To save time, I reused the circuit from Appa for the keys and then focused on the RGB schematic, for both the underglow and the backlight.
I chose to use WS2812b LEDs for the underglow, due to their availability and popularity in RGB LED strips. For the backlight, after a thorough search, I found 6028R LEDs, which have a separate channel for each color (red, green, and blue) in a single package. However, after some community feedback, I switched to SK6812 LEDs, which are small enough to be placed under the keys.
The schematic diagram of the keyboard can be accessed here
The final result of the PCB can be seen in the image below:
The schematics and gerber files for making the board are available in the momo-pcb repository.
Assembly and Soldering
Assembling the keyboard required patience and basic soldering skills. Although I don’t have many photos and videos of the assembly process, I created a video showing part of the process:
Programming
Programming the keyboard was straightforward, using [QMK] to generate the firmware and adapting the Appa code for the RP2040. For more details on this process, check out the Appa post.
The Final Touch: Customization
The final step is customization, where the keyboard becomes truly unique.
Case
For the Momo case, I decided to go bold. Instead of a conventional “sandwich” construction with stacked acrylic layers, I opted for an “open” design featuring spacers to separate the layers. This resulted in a stunning look:
The true beauty of building your own keyboard lies in customization.
Here are some ways to customize it even further:
Keycaps
For the keycaps, I used two SA profile keycap kits I already had at home, purchased from Aliexpress. One of these kits consisted of black and translucent keys, which I combined with XDA profile keycaps for special keys like Shift, Enter, Space, Control, Alt, Right Alt, Super, upper layer, bottom layer, Backspace, and TAB. However, after realizing these keycaps didn’t pair well with the RGB, I switched to a red keycap kit that fit perfectly:
The final result turned out amazing:
Choosing the Switches
I experimented with different switches throughout the process. Initially, I went with Outemu Brown switches, lubricating them for a pleasant sound and feel. However, after looking to improve the sound, I switched to 48 Outemu Purple switches. Even without lubrication, these switches produced an amazing sound.
Later, I tried Akko’s V3 Cream Blue and V3 Cream Yellow tactile switches and was impressed with the quality. I added V3 Cream Yellow switches on the special layer keys and Shift, while keeping V3 Cream Blue on the rest of the keys.
These switches are simply sensational and provide an incredible typing experience. Unfortunately, I couldn’t record the sound of the keys, but I share a video demonstrating the sound of Akko’s V3 Cream Blue switches:
The Journey Continues
Building the custom Momo mechanical keyboard is a rewarding and exciting journey. This is just the beginning of my creative exploration and passion for technology. Beyond getting a keyboard that perfectly meets my needs, I created a unique piece of hardware that is truly mine.
As you dive deeper into the world of keyboard customization, you’ll discover a vibrant community of enthusiasts who share the same passion. So, if you’re ready for a customization adventure, go ahead and start planning your own mechanical keyboard. Remember to share your journey with other enthusiasts and inspire new creations. Who knows, you might create the next amazing keyboard everyone wants to have!
If you’d like to learn more about the process of building custom mechanical keyboards, also check out my previous post, which offers additional insights.
See also
- teclado-appa — the ALPS keyboard that inspired Momo
- glossary — terms like QMK, hotswap, underglow, backlight, RP2040, WS2812B, SK6812